Hey all! Hope your weekend was great! We had so much fun -- family stayed with us most of last week through Sunday and it was fun to have a full house.
My plan this morning was to take new photos for this post -- but then we had thunderstorms and it looked like nighttime outside. Too dark for pics! So this post is a combination of photos from recently and over the past couple of years -- if things don't match from photo to photo that's why. (And now of course as I write this the sun is coming out.) 😐
I finished our kitchen renovation a year and a half ago and I get a lot of questions about how things are holding up and how I'm liking changes I made. I wanted to follow up again to let you know specifics on some of the bigger changes I get asked about the most.
It's hard to pick a favorite thing in this kitchen...I'm just so pleased with all of it. But extending the island was one of my best decisions for sure. It is SO wonderful to have a larger space to prep/cook/bake on. And when we entertain we can now fit all of the food on the island 😊:
If I remember right I added about three feet to the island -- almost doubling the size. If you have the room I highly recommend doing this. I built on to the previous island and added wine storage, a spot to hang towels and other items, storage at the end, a spot for the microwave and room for a third stool on the other side.
One of the questions I get asked most is about our microwave in the island and if I like it after all this time:
I LOVE IT. One of the best things I've done in the house, let alone the kitchen. I love that it's not the center of attention anymore (it used to hang above the stove). It took a little getting used to having it down lower, but now it's no big deal at all. My husband had a harder time getting adjusted than I did -- I loved it right off the bat. ;)
We look through model homes all the time for fun and microwaves in base cabinets are definitely becoming a trend. A lot of them are actually lower than ours (but are nicer versions with a drawer):
You can see how I built the island here and how I built in the microwave and allowed for venting here.
We only updated one appliance when I remodeled the kitchen and this trash compactor in the island is the only one that doesn't match the rest of the kitchen:
When we built I went with a combo of black and stainless appliances (wish I gone all stainless) and that's the last black one...and it's still doing just fine. I'm sure it will be years before we need to replace it with a stainless version. You can see more about that trash compactor and why it's my favorite appliance here.
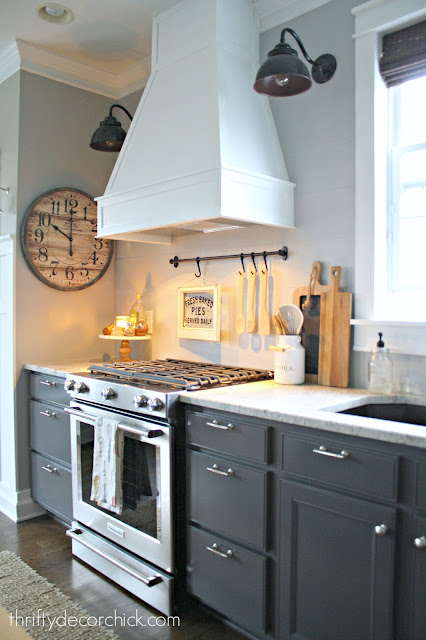
We splurged on a slide in range -- it had always been my dream to have the clean lines of this type of oven and the hood on the top:
We bought the KitchenAid slide in and I LOVE it. We've only had one small issue with it -- two times now the display has gone out. The oven works but you can't see what you're setting the temp to without the display. Thankfully it comes back pretty quick (within minutes) but it's annoying when it happens.
I think the question I get more than any other project I've ever done (EVER!) is about the planked/shiplap backsplash. I used cement boards specifically because we had a slide in range and I wanted something that would be heat resistant. Plus it's a fraction of the cost of tile...and way easier to install.
I didn't leave much of a gap between the boards because I knew I'd want to caulk between them anyway (who wants grease/food in there). It's sometimes hard to see the boards in pictures but they are much more obvious in person. They are virtually care-free -- splatters wipe right off. They look just like the day I installed them! The only change I may make is to paint the backsplash a lighter color sometime this year. You can see the details you need to know when installing a cement board backsplash here.
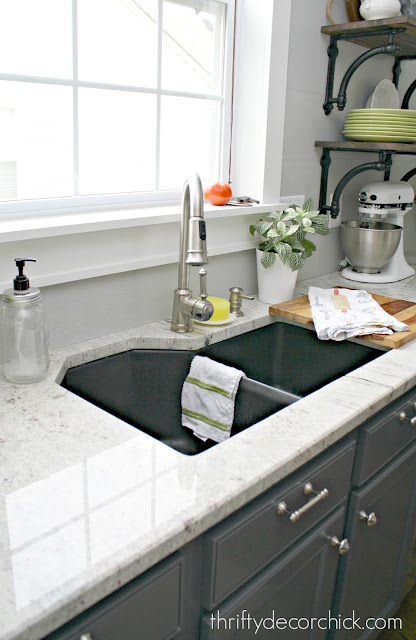
Years ago I thought I may not like a stone countertop but I'm so glad I changed my mind. I love our counters and love the deep sink:
The counters were sealed well and we still haven't had any issues or had to reseal yet. It's supposed to hold up for years I believe. Often with granite you can see that the color changes around the sink over time and we haven't had any problems with that. I wasn't sure I'd like a shiny countertop surface but I immediately loved it when they installed them. The room needed that little bling! You can see which granite we went with and the company we used here.
I like the look of a farmhouse sink but didn't think the cost was worth it -- especially when we loved our deep sink (the dark gray works perfectly in here). I have mentioned that you may want to reconsider a deeper undermount sink if you are tall. It took some time for me to get used to that (it dropped another 1 1/2 inches when undermounted) and I'm 5'9" and my husband is 5'11".
Another project I'm SO GLAD I tackled was taking down a few cabinets and then extending the other ones to the ceiling:
I'll link to all the before photos at the end of this post but we used to have a few cabinets on the stove wall and I took those down. It opened up this room a ridiculous amount -- such a good move. If you are considering this I don't think you'll miss them:
I built in the area around the fridge and later built the cabinets up to the ceiling. Having them go all the way up makes the whole kitchen feel so much more custom:
And of course the biggest change was painting the cabinets! I am asked about these a ton too -- and they have held up SO WELL. I'm honestly a little surprised at how well. I did a follow up about them a month after I finished the kitchen and you're considering painting make sure to check that out. You MUST let them cure for a couple months before the finish is truly ready for wear and tear.
I shared the whole process of how I painted them (and how they look like they were sprayed professionally) in this post. You do NOT have to sand the finish off of your cabinets if you want to paint! Of all the changes I made in this room, painting the cabinets was the most dramatic and the biggest bang for the buck. (I saved thousands doing them myself and they've held up better than some professional jobs I've seen.)
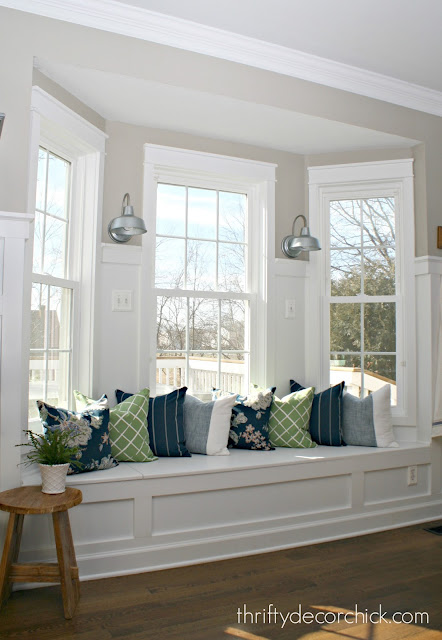
I did take away some storage in this room by taking down cabinets, but more than that was added back in the form of the upper cabinets (I use all of those baskets for seasonal kitchen items), the storage at the end of the island and a ton of space in the new window seat:
I still get the heart eyes every single day when I walk in and see that seat. ;)
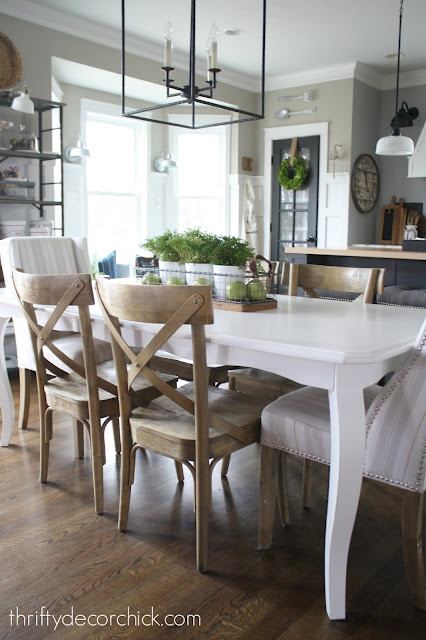
The only project (so far!) that needs to be touched up is our kitchen table -- you can't see from photos but I need to repaint the top:
It gets a lot of use so I need to sand it down, do a couple more coats of paint and then put a protective finish on it.
Whew!! I've said it before but it's so true -- living with this space for years before tackling it and doing the reno over nearly a year (I would do one project at a time) really helped us to make great decisions about how this room needed to be set up. It functions so beautifully -- I don't think I could ask for much more. I'm so very pleased with how well everything has held up so far. It's fared better than I had even hoped.
I tried to touch on the projects that I get the most questions about, but if there's something I didn't mention that you are wondering about, please let me know!
You can see the full reveal of the room with tons of before and after photos (my favorite!) here and I went into more detail about all of the sources and projects in this post.


