So I've been wanting to tell you about this little gadget for a while now, but really wanted to see how it worked before doing so. I freaking LOVE it...so it's time. :)
I discovered the Amazon Dash buttons last year on Prime Day. I had no idea what they were but they kept popping up as I shopped so I did some research. They were super cheap that day (I think a buck each?) so I put a few in my order and decided to try them out.
Well...as I said, I LOVE THEM. I've found the older I get the less I like to leave our house. I mean, I'm no hermit...we're out nearly every evening for activities and love to go out with friends. BUT...when it comes to running out to the store to grab that one thing we need, we'd rather just stay home. Annnnd now we can. ;)
We got a few of the buttons and there are a couple we use quite often. I'll show you how to use them here -- it's kind of amazing. We keep a couple in our laundry room cabinet:
No, those cabinets still aren't painted. Someday.
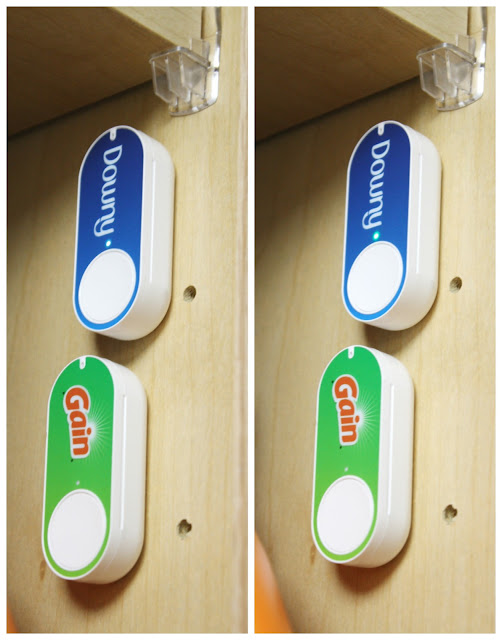
We keep our Downy and Gain buttons in here -- they come with a sticky back so you can hang or place them just about anywhere:
When you notice you're running low on whatever the product is...you just push the button. It will flash with a white light (the Downy button on the left) and then when the order is completed, it will flash green (the right):
And then in a day or two your products arrives at your door. That's it!
I mean. Come on! It truly felt like the Jetson's when we first tried it...I just think it's awesome.
I love ordering online because I know I spend less. We've even started ordering groceries online occasionally because I can sit with my shopping/recipe list and I only order what we need. No impulse buys.
Same goes for these items, that I would run into Target for and then just happen to stop in the dollar section "real quick" and then forget why I even went in and come out an hour later with a cart full of other stuff. I hear that's how it goes for some anyway...
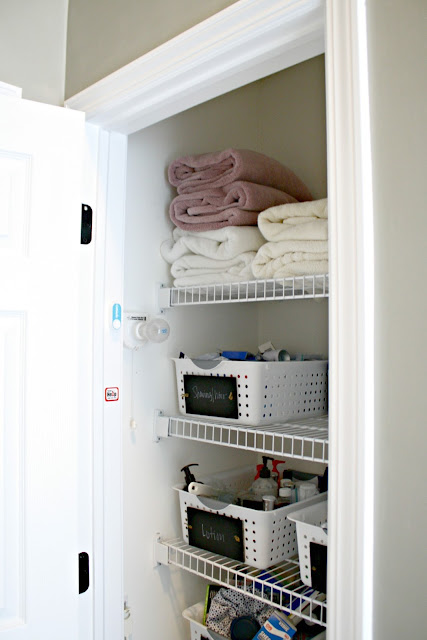
My favorite button is the one for toilet paper that we keep in our master linen closet. Down to just a couple rolls? Hit the button and voila! TP to your door:
A few things to consider:
- When you get the button you need to set it up for the item/size you'll want to be shipped each time. It comes with instructions and it took just a few minutes for us to set up each one. After that you just push it and you're done. There's actually a Kindle book that tells you all you need to know for these buttons now! It has excellent reviews so there may be info in there I don't know about these little jobbies.
- As far as I know, you can only set it up to order one thing with one button. So if you use Downy fabric softener and the pellets, you can only use your button for one item. I am pretty sure anyway, I could be wrong.
- Because I kind of hate how Amazon uses so much packaging for small items, I try to coordinate our smaller purchases with other orders.
- You have to have Amazon Prime to use them.
- I could have sworn the buttons used to be $3 but now they're $5. But I truly believe we save over time by not running out to grab a few items. Be sure to watch for promotions -- I'm sure they'll do something special for prime day again this year.
We use the Downy button, Ziploc, Gain button and my favorite, the Cottonelle, but they don't seem to have that one right now. (They do have Charmin!).
They have a TON of buttons -- it's kind of fun to look through the list. Everything from paper towels to dog food, diapers, trash bags and food products (for those of you with toddlers, Goldfish crackers have one!). They even have a Nerf button! 😂 (Just don't tell our son!)
Have you tried these little gadgets? We love them in our house and are always considering more. I'm all about anything that lets me stay in my pajama pants a little longer every some days.
Have a great weekend my friends!
Affiliate links included for your convenience!


Comments
Post a Comment