It's been about six months since I finished up our loft makeover and I have to say, beyond our kitchen and basement projects over the years, this redo is the smartest and most used in our house. I LOVE that because we barely used this room before.
I gave up my office when we took down a wall and extended our family room years ago. For a couple years I didn't mind not having a true work space and would just sit on a chair and work from there. But I was starting to crave a dedicated office again, but I wanted it away from our living spaces.
This unused space was a PERFECT fit...we didn't realize how perfect until after it was finished:
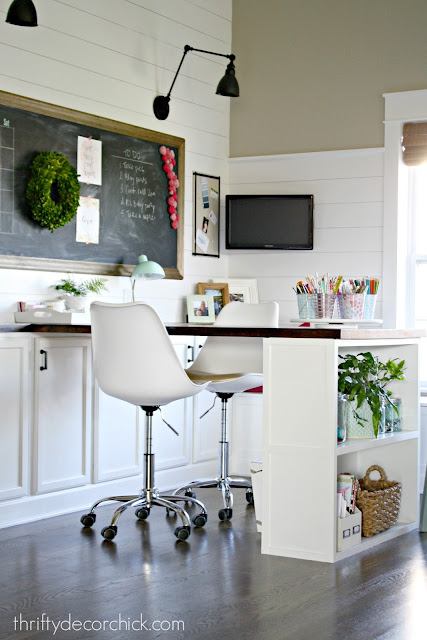
My husband has a studio set up in the basement but craves natural light during the day when he works (I don't blame him). So now most days both of sit at the big desk together and work. I love it! The desk has worked SO wonderfully. This morning I took a pic of it covered with stuff to show you -- he had his keyboard and computer there and I had my sewing machine and fabric all over, and we still had plenty of room. (I accidentally detailed the picture, dangit.)
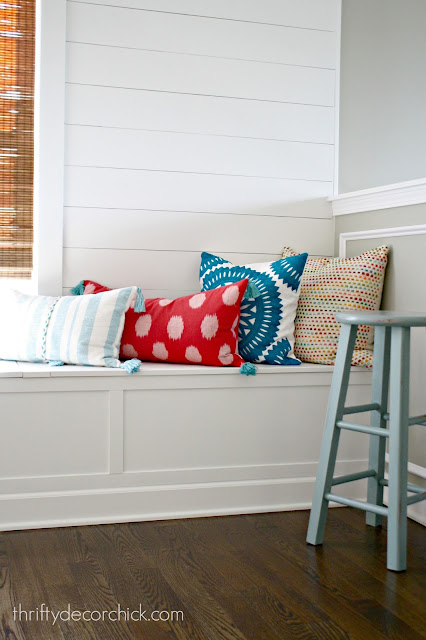
Anyway, this room works smart for us and I promised months ago that I would share more about the awesome storage and organization in here. First up, that huge window seat that serves double duty:
It spans the whole wall and when it was built I had them break it up the inside into three sections.
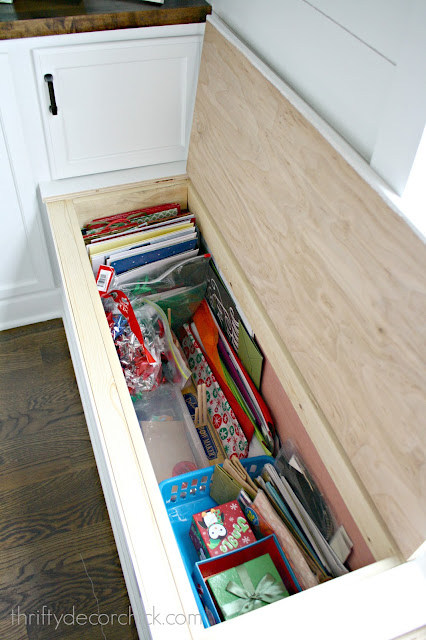
One I use for wrapping needs like boxes, bows, bags and the like:
I found the bins at the dollar store and they hold smaller stuff like bags and boxes.
The middle section is where I store my sewing machine and extra fabric:
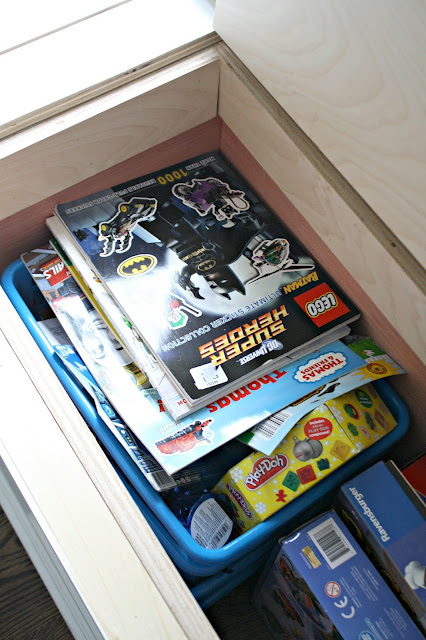
And the last one is for toys, games and gifts that I buy when I find them on clearance or duplicates we get as gifts:
I have found that window seats are such a lovely combo of form and function -- they look so good, give you another place to sit and offer so much storage inside!
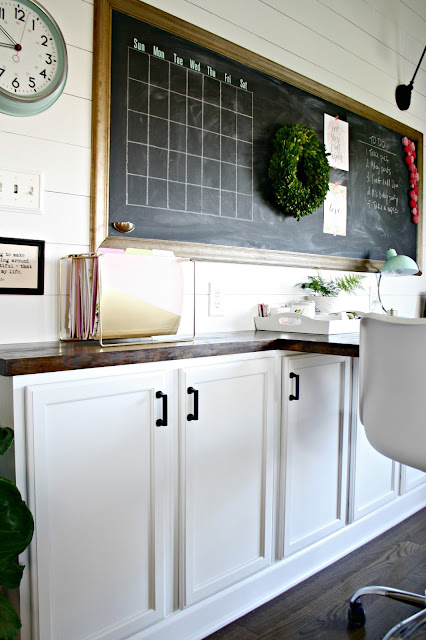
Another area of this room that we are LOVING is the huge DIY chalkboard:
We use it for lists a lot -- I'm a visual person and need to see my list in front of me. Back when I finished the room I drew a calendar on the wall with chalk, just to see if I'd really use it.
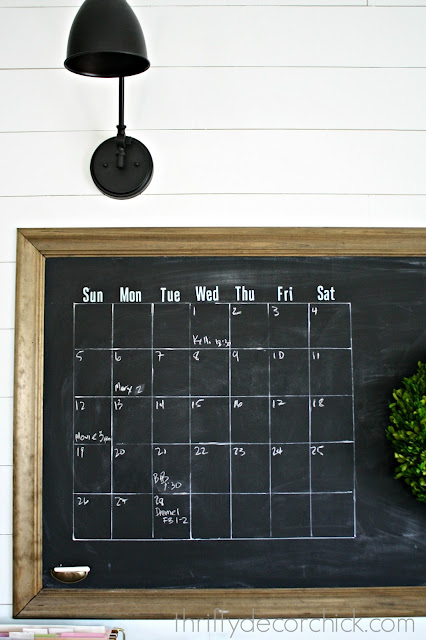
Turns out I love having it so visible so I went ahead and used my level and a white Sharpie marker to make it permanent:
Now I can write in the dates and appointments on the calendar and when I erase the calendar stays put. It's such a little thing but it really has helped me stay on top of things.
By the way, I use a cup pull turned upside down to hold the chalk. :) I just hot glued it on there:
I had the sticky letters for years in my craft stash and thankfully there were enough to add the days at the top.
The wall of cabinets (kitchen cabinets are crazy versatile!) gives us a ton of storage for craft and office supplies:
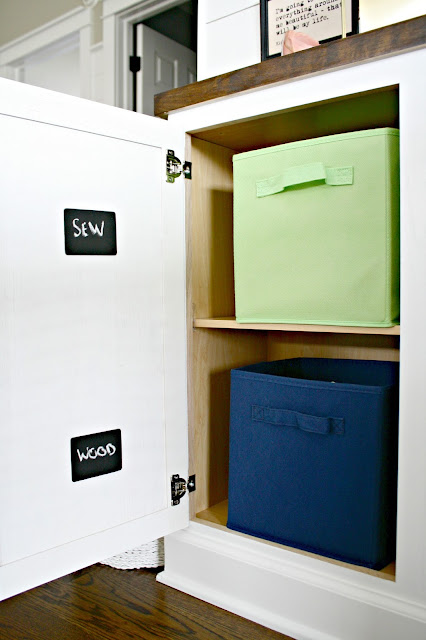
I've had these bins forever -- they are just the canvas square storage bins you can find at most stores. I have craft stuff organized by topic -- glue, Christmas, fall, wood, paint, etc:
I had a bunch of wood tags I used years ago (when this was the Bub's playroom) and spray painted them with chalkboard paint:
I just glued them on the back of the cabinets and I can erase and change the name if needed.
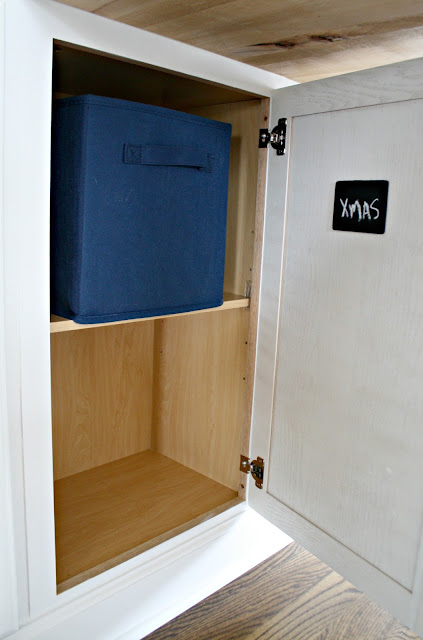
I LOVE that I have empty space in the cabinets:
As you can see, I configured the cabinets so that the doors under the desk open the opposite way. I put seasonal stuff in these and don't have to access them often -- even though they are still easy to get to.
We have our extra office supply stuff down in my husband's studio but I'm thinking I'll move it all up here since we have plenty of room. The bookcase at the end of the desk holds more craft storage and office supplies:
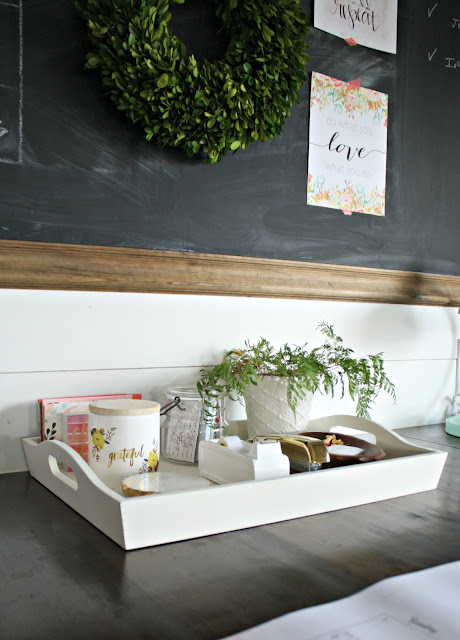
And for stuff that we need to reach for while working (things like tape, stapler, notepads), I use a tray to corral it all:
That plant was looking sad when I took this...we hadn't had sun for what felt like weeks. We had three days of sun this week and he's looking so much better. ;)
I think (other than the kitchen) this room is our hardest working in the house. That kind of blows my mind because we didn't use it much before! I take forever to tackle and finish rooms in our home but I know it works in our favor. Our rooms function so well for us, which is worth the long makeovers! :)
To see some cute craft storage pretty enough to keep out, be sure to check out this post. Have you incorporated any of these ideas into your work spaces? I love to hear how people organize!





Comments
Post a Comment