Hello my friends! I hope your weekend was great. I have lighting on the mind lately -- I picked the wrong lights for the wall in the loft/craft room redo that I'm working on and need to find something else that works better. I don't often misstep with that kind of thing but the ones I got are crazy big!
I need to reevaluate and I think I know the direction I'm heading. I have a trend in my own home and it comes from my love of sconces. I adore them. But the kind I like, with beautifully arching "necks" or swing arms that are adjustable ALL seem to be ridiculously expensive. Like, $200 and up a pop. For one I may spurge…maybe two. But usually you use more than one:


I need to reevaluate and I think I know the direction I'm heading. I have a trend in my own home and it comes from my love of sconces. I adore them. But the kind I like, with beautifully arching "necks" or swing arms that are adjustable ALL seem to be ridiculously expensive. Like, $200 and up a pop. For one I may spurge…maybe two. But usually you use more than one:

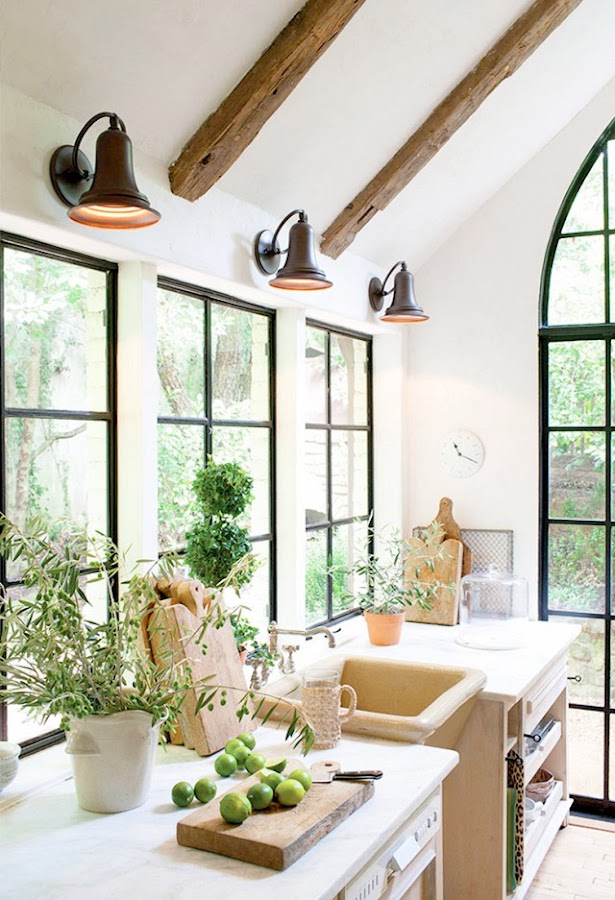
Goodness, that kitchen is dreamy. I want black window mullions in a bad way.
Anyway, I just love the look. They look great in kitchens, in hallways, over windows and doors, in stairways, workspaces…everywhere:

I learned years ago that the price was more than I was willing to pay, so I started thinking outside the box. The answer? Outdoor lights! I've done it again and again and they give me the look I want for a fraction of the price.
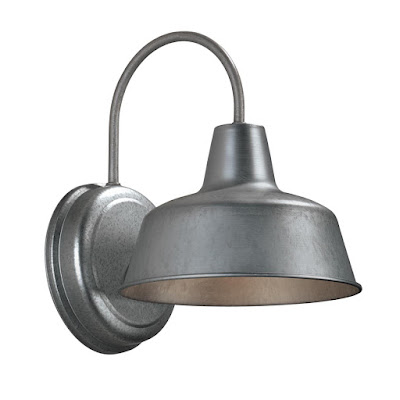
I used this galvanized light from Lowe's in a couple spots in our home:
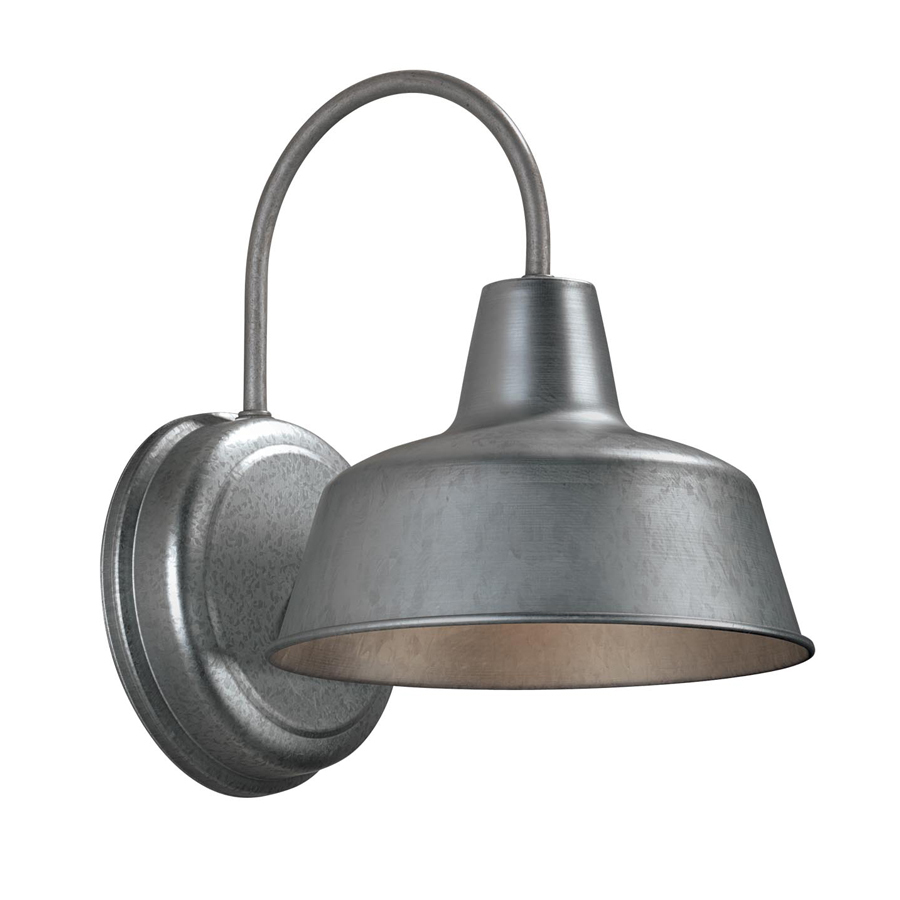
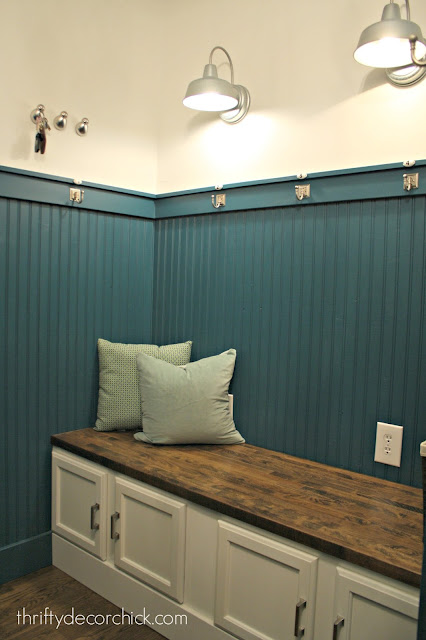
It's $30 and super cute. I used a couple in our mud room:

I love that galvanized look!
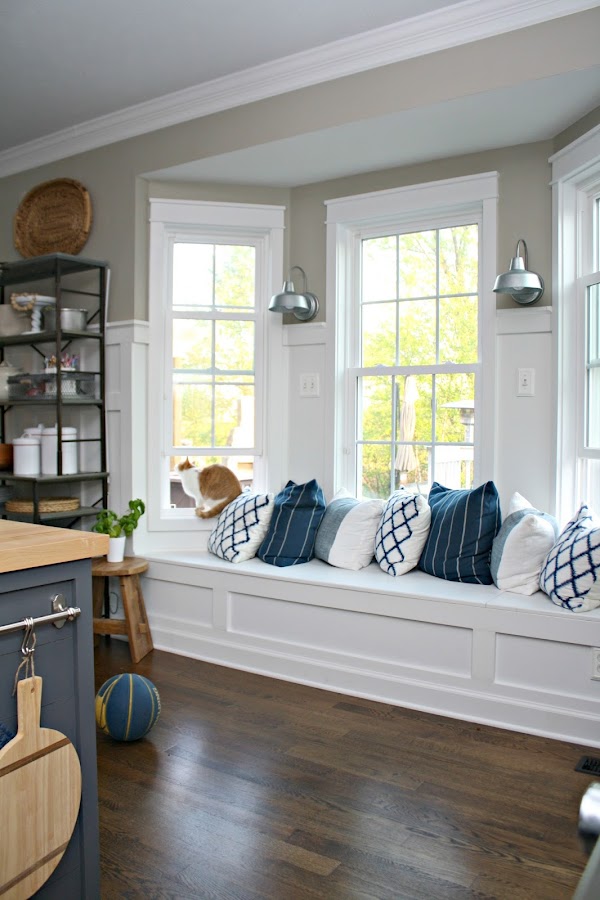
And also over the window seat in the kitchen:

Most of the outdoor lights I find that I like are rated and described as "dark sky" which means they cast the light down below (this helps lessen light pollution outside). For inside this means ambient lighting that is perfect for cozy spots or areas you need task lighting.
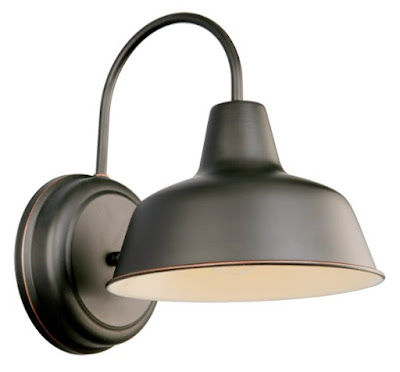
I found a dark bronze version of this one here:

I think the first time I ever used an outdoor sconce inside was in my son's book nook I created years ago:
I still think it's the cutest little light ever and I found it for only $12 at Menards! Seriously, the outdoor lighting prices are a steal compared to indoor sconces.
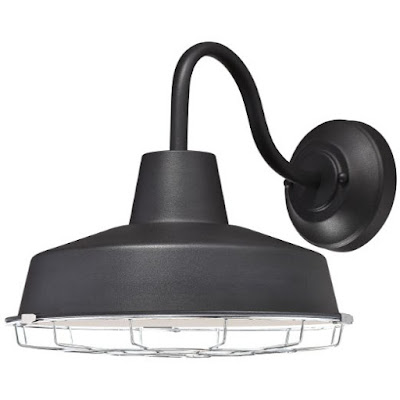
I can't find that one anymore but I LOVE this one too. It has the cage look on the bottom, which is very industrial and farmhouse-y:

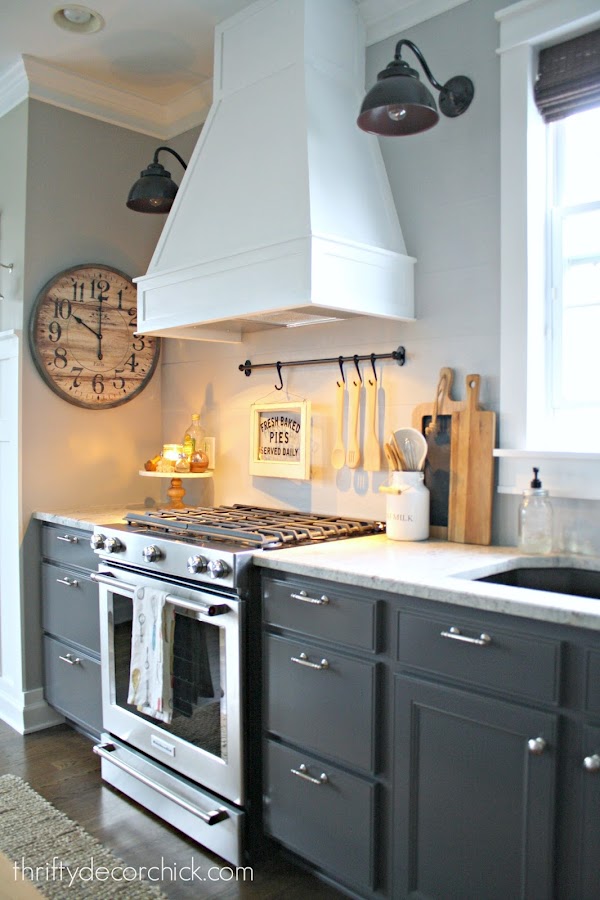
I knew I wanted to add the same look on a large wall in our kitchen, but didn't want to spend a ton. I found the perfect solution with these dark sky lights:

I ended up spraying mine black and I LOVE them in our new kitchen:

I put the vintage bulbs inside for a soft glow (and they are dimmable). They are one of my favorite parts of our kitchen!
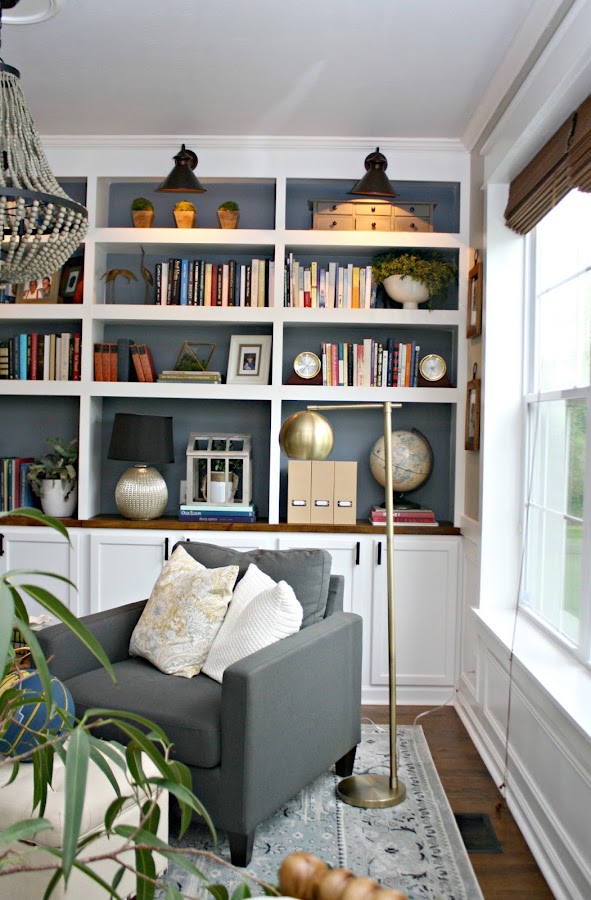
I looked for MONTHS to find exactly what I wanted over the DIY bookcases my Dad and I built for our dining-room-turned-library. I mean, it was driving me crazy. Of course when I looked at the outdoor section at Home Depot I found something that worked perfectly:
I wanted these to tilt and shine onto the bookshelves, so I bent them ever so slightly and it worked! They are lovely and I adore the added light in here:

I needed four and at only $30 each these were a fantastic find. Unfortunately I can't find these exact versions at Home Depot anymore but you can still find them on Amazon here. I love how the bronze glows underneath when they are lit up:

There you go -- a much more affordable option if you love this look as much as I do! These sconces are one way I love to add character to our home -- they make it feel so cozy and older than it really is. It's a timeless look that I just love.
So if you're on the look for that perfect sconce, check the outdoor lighting! I bet you'll find something you love! I'll be back soon with an update on what I pick out for the loft project. :)
I'll be back this Friday as I'm taking a few days away from the computer to hang with my family this week. See you back here then! :)
Some affiliate links included for your convenience.

Comments
Post a Comment