HEY there! What a fun weekend that was! I ended up getting a ton more done in the loft last night -- all of the cabinets are built up and installed and that was a BIG job. I also got everything put away in the cabinets and seat storage -- it is glorious! I have room to spare, whoot! Today I hope to work on baseboards and trimming out the window seat and maybe the window itself as well.
I'm totally digging that space and it's really starting to match the vision I had all these years! I have said it a million times, but I find when I really take my time and let the ideas develop in my head the spaces come out better than I could have hoped.
One of the rooms where that showed the most was our kitchen renovation that I completed last fall. I've been meaning to update you on some of the key pieces and since we've lived with it for about nine months now, I figured this would be a good time.
This renovation took me almost a year -- in the summer I'm usually a sloth so not much happened over those months, but overall it took a long time. We paid cash for everything and I did about 85 percent of the work in this room:

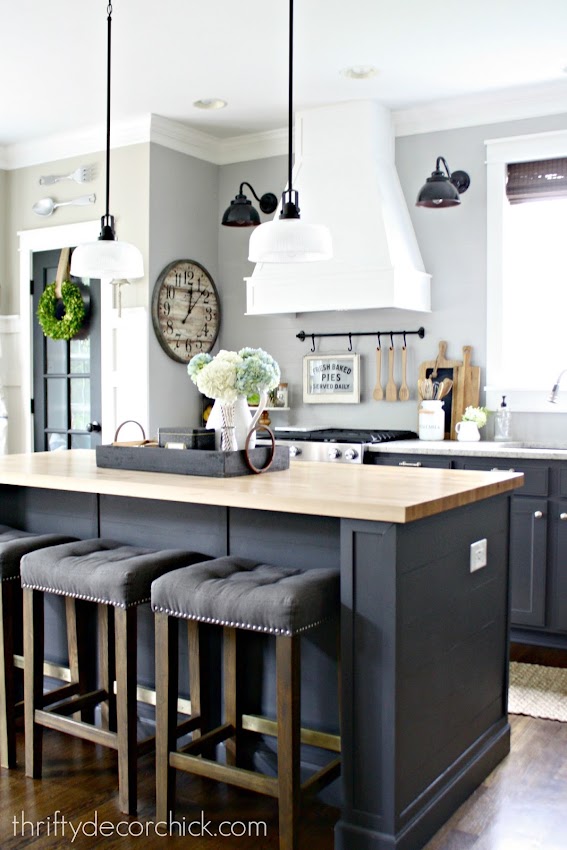
My first project was extending the kitchen island and I'm still so thrilled with it. The larger surface area is FANTASTIC for baking and cooking and entertaining. If there is one thing I'd recommend doing, this would be it:

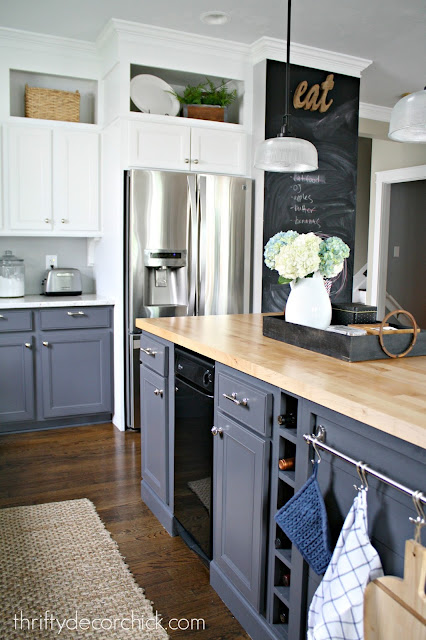
I used our old island and built off of it. It now has wine storage and the end holds the microwave and more storage. We also can sit at least three at the island -- four if you pull a chair up to the end. The butcher block has held up well and I love the warm wood against the cabinets. It does show wear easier than other countertops, but I'm used to that and love it. You can't be a stickler if you want wood countertops. :)
Speaking of that microwave, I think that's the number one question I get -- how do we like having it lower?:

I LOVE it. It took my husband longer to get used to it but now he doesn't mind it. A couple things to consider -- we don't use our microwave a ton. Maybe once a day, if that. Also, I'm tall and I still find it more convenient. I shut the door with my knee when I'm taking stuff out. :) The biggest thing is I think it's easier to get food in and out -- with really hot dishes maybe not so much, but as far as safety I think pulling them up and setting them down on a surface is easier and safer than pulling them down from up high.
I was melting chocolate the other day and it was SO nice to be able just stand there at the end of the island and check on it over and over. And overall it's wonderful to not have it as the focus in the room. (Most new people to our home can't even find it, ha!!)
Another little adjustment I made early on (and I'm so glad I did) was to move the island away from the walls a little bit:

It just makes it feel more spacious in here and when we have people over it's easier to move around. I wouldn't move it too far -- we have our trash compactor in the island so I like that it's close enough I can just turn around from the sink to get to it. But moving it out has made the room feel bigger and easier to navigate.
OH! The other question I get a lot is about that rug! It's from Target and I love the rug but DO NOT vacuum it. It will fall apart, I learned that fast. We still get random tufts that stick up occasionally and I just cut them off. I know you're not supposed to do that but there's no way around it -- and surprisingly it's held up well.
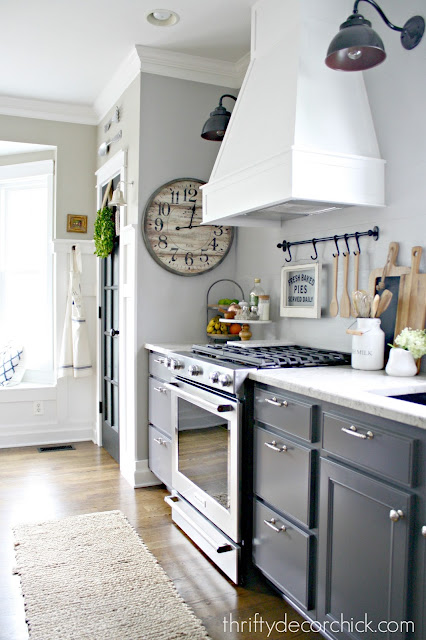
We invested in two splurges in this kitchen -- the slide in oven was one:

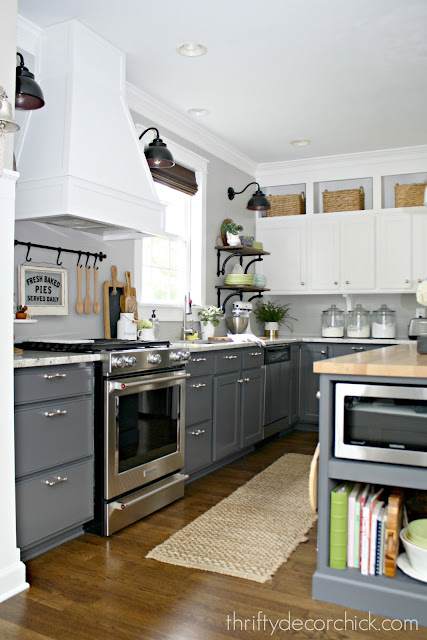
I LOVE IT. It's so easy to operate, easy to clean and it cooks and bakes great. I love the look of it too -- not having a back to it makes the whole kitchen look more custom. I'm also happy that we went with a vent hood that vents outside -- I feel like it does help to get rid of smells quicker.
The countertops were another splurge but I shopped around and actually found what I wanted for $1000 less than my first quotes, so do some checking. Honestly, I hesitated a bit to go with a hard surface. We had laminate that looked like granite for years and I really loved it. I was afraid I'd break a bunch of dishes knocking into granite but I haven't done that once. It was another addition that really amped up the whole feel of the kitchen.
One thing I didn't consider is that the counters are about an inch thick, so our already deep sink (which is a MUST if you are redoing your kitchen) got even deeper. It wasn't undermounted before so it was an adjustment for me to get used to at first. It felt SO deep when I would wash dishes:

Now I don't notice it, but it was a big adjustment at first. If you are really tall (I'm 5'9", my husband is 5'11"), then you may not want to go too deep with your sink. I wouldn't give mine up for one meeeellion dollars though. Also, having an undermounted sink is a gift from the heavens, no lie. Being able to wipe crumbs right into the sink without it getting stuck around the rim is fantastic!
One thing to consider -- if you are making smaller updates like we did years ago with our sink and faucet, consider something that can be used down the line if you upgrade again. I specifically went with a sink that could be undermounted, even though we didn't do that until years later.
I get asked about the backsplash a lot too -- I went unconventional with that and it's been awesome. It's so easy to clean and I feel at ease using it behind the stove top as well. It's hard to see the planking in photos, that's the only thing that bothers me. But in person it's obvious and gives the kitchen some farmhouse feel:

The biggest undertaking in here was painting the kitchen cabinets -- I'm SO SO glad I decided to tackle that myself. I hesitated thinking it would be too much work and honestly, it takes time but it's not a ridiculous amount of work. The biggest hassle is waiting between coats so it takes a good week to two weeks to do it correctly. (Side note, this is their true color. They lean a little blue in some of my pics.)
A few weeks after the reno I shared an update on the cabinets and how some of them had not cured even that long after. I had anticipated that but was still surprised. I'm happy to report that they are now wipeable and scrubbable and there are zero imperfections beyond what I first saw.
One thing to mention -- if you decide to paint your cabinets I recommend you put hardware on them. Especially at first until they fully cure (but don't put them on too soon -- I waited and then didn't tighten them for weeks). The less you will actually handle them the better, and using hardware will keep them looking beautiful for a long time.
The final thing I'm SO happy we did was part of a bigger project years ago when we moved things around in the family room. Our old back door used to be in the middle of this bay window and things were so cramped over there:

That area was where our kitchen table used to sit and when we shifted everything over it allowed this area to be transformed. That window seat is one of my favorite spots in our entire house. I absolutely, positively adore it. AND it offers tons of storage.
I have been keeping mental notes of what I've wanted to share with you all these months and I think I hit them all! If I missed something you're curious about please let me know. ALL of the sources for items and projects in this room are linked in this post. We didn't move any plumbing or cabinets and that helped with the budget a ton. I shared a breakdown of the whole renovation here.
And because I can't resist, here are a few before photos to show you how different this kitchen looks now...


Comments
Post a Comment