Hey there! I'm back with some slight progress (but still progress) in the loft/craft room that is my project for the summer. I told you about it here and it hasn't moved as quickly as I'd like just beceuase we've been out of town so much this summer. Since I shared this room last I've had extra outlets installed and wiring for sconces run. The lights just came this morning so I'll put those up today to see how they look -- I will show you soon!
I'm building a wall of storage/desk in this room and I'm going back to my standard when creating built ins in our home -- unfinished upper kitchen cabinets. I've used these a few times in various ways throughout our house and I keep going back to it because they work every time! They always turn out looking fantastic so I'm sharing how I get them to that point today.
I played around with the measurements and finally came up with a plan for cabinets that would fit without any reconfiguring on my part. I want this to be easy. :) This wall is about 11 feet and I am leaving room at both ends -- one end for a long window seat that will go along a wall and the other end I'm planning to leave an open spot:
I still have two more cabinets to buy but this gives you an idea. I'm leaving about six inches at the end where the wall stops because when we move someday this room could be turned into a fourth bedroom. I think it would help our value quite a bit to do that so I want to leave plenty of room for a wall to be put in there. My design for this room will work great even if this room is ever closed off.
These are 18 inch wide by 30 inches tall -- since I add a little height the desk area will be a little higher than standard height. I've already found adjustable desk chairs that will work perfectly. :) I plan to pull these away from the wall just a bit (I'll build brackets that will attach into studs and then connect the cabinets) so that the counter area is bigger than the 12 inch depth. I'm thinking at least 18 inches.
The first step to making kitchen uppers look like built ins is raising them up a bit. If you just put them on the ground they look out of place. I use 1x4s and nail them into the sides around the bottom of the cabinets:
The center piece is for added support. To make these look custom I wrap the bottom with baseboards and this pulls them up off the ground so that's possible. I add scrap wood around the bottom to make it flush with the cabinet before I install the base -- otherwise your base would tilt back into the open space against the 1x4.
When you add the base and and then some simple trim on the ends to dress it up, it gives it all a much more sophisticated look:
Of course the butcher block counter offers some nice contrast and makes it feel even more custom:
Right now I'm planning a butcher block top in the loft too, but that may change.
This built in is in our dining room turned library and I've shared it a million times, I know. But we easily saved a couple grand by doing this project ourselves. The inexpensive cabinets make it a really affordable project!:
It is truly the best combo of form and function -- those cabinets are only 12 inches deep but they hold a ton! (Think of how much they hold in your kitchen.)
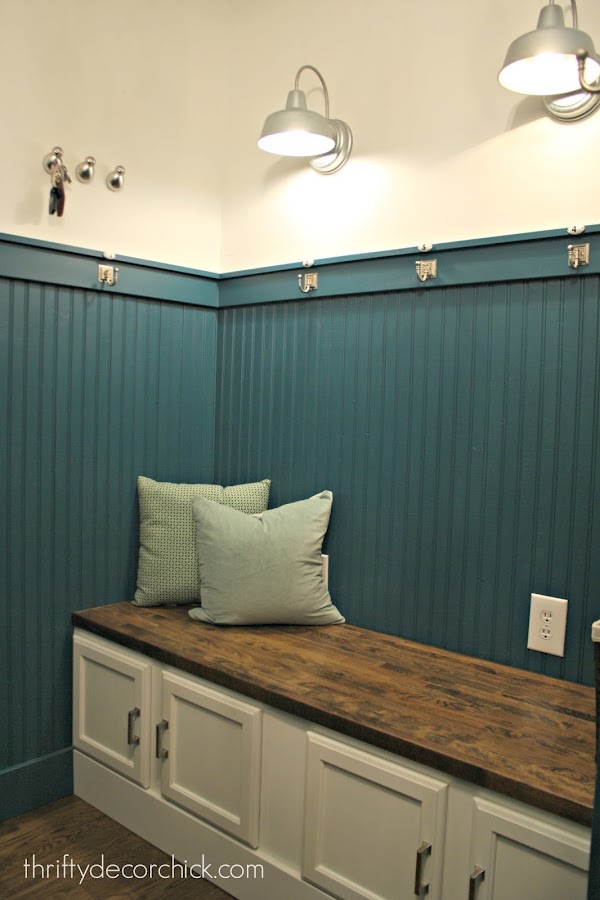
I used the upper cabinets that go over the fridge for our mud room bench:
And my first project with these was another project I did with my Dad for my son's bedroom:
I have Dad to thank for this idea -- he's the one who thought of it for this room and I've kind of taken off with it. :) I think the loft will be the last place I do this though -- I don't foresee anymore built ins in the house!
Have you tried this trick to build custom built ins or bookcases? I'm thrilled with how they look in our home and I hope to share you a lot more progress in the loft very soon!


Comments
Post a Comment