Hey all! I'm back today with a quick post about a project that's not so quick. ;) As some of you know, I have painted most of the doors in our home in black. I haven't started upstairs yet (I know it's going to look so good!) and I thought I had finished them all on our main level and basement.
I keep forgetting about a couple -- one in our powder room and one in the basement laundry room. I'm determined to get those done before I move upstairs.
I'm going to try spraying them when the weather gets nicer, but of course this week we have temps in the 20's and snow when the past two months were 60's and 70's. 😡 So...I had to work on it inside.
I think this makes SUCH a big difference and it's not a hard project at all, but it does take some time. I've shared how to paint your doors (interior and exterior here) and you MUST find out if they are painted with oil or latex paint before you start. Most doors are painted with oil so if you paint without primer, it will come off later. Sometimes it will flake, sometimes it will peel. But it will come off and really annoy you. ;)
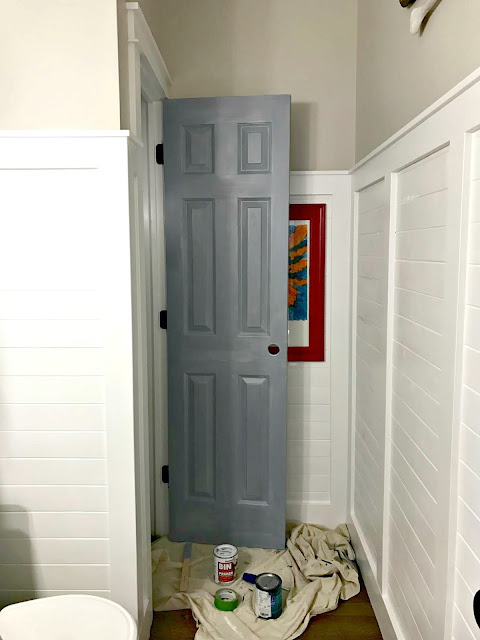
So I always prime our doors first:


I keep forgetting about a couple -- one in our powder room and one in the basement laundry room. I'm determined to get those done before I move upstairs.
I'm going to try spraying them when the weather gets nicer, but of course this week we have temps in the 20's and snow when the past two months were 60's and 70's. 😡 So...I had to work on it inside.
I think this makes SUCH a big difference and it's not a hard project at all, but it does take some time. I've shared how to paint your doors (interior and exterior here) and you MUST find out if they are painted with oil or latex paint before you start. Most doors are painted with oil so if you paint without primer, it will come off later. Sometimes it will flake, sometimes it will peel. But it will come off and really annoy you. ;)
So I always prime our doors first:

The great thing is there is no need at all to sand -- just clean it well before starting. And I don't take mine down when painting by hand -- there's no need. (You'll need to tape around hinges if you will see that side of the door.)
I go into detailed instructions on how to paint a door in that link above, but this is the primer I use:

Because I go dark I have this tinted to a gray. This primer is awesome and is my favorite -- it's super thin and easy to apply, but watch for drips. A small quart of this will last a very long time, you don't need much. It also dries incredibly quick so that speeds up this process a bit.
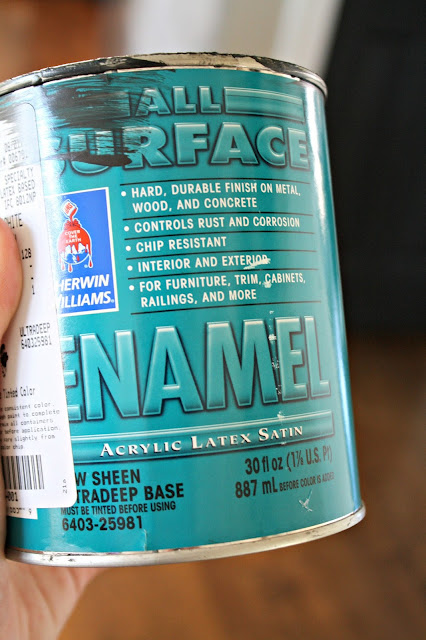
Our doors are all painted in Graphite, it's a very dark gray instead of super black. I have it mixed in Sherwin Williams paint just because I love their stuff. This enamel paint is what I use for our doors:

I use eggshell or satin but most prefer shiny doors, so the finish is your preference.
One coat of primer, two coats of black and some touch ups and it was done:

I am totally in love with the look of black interior doors. Every time I do this I fall in love with them all over again! LOVE!:

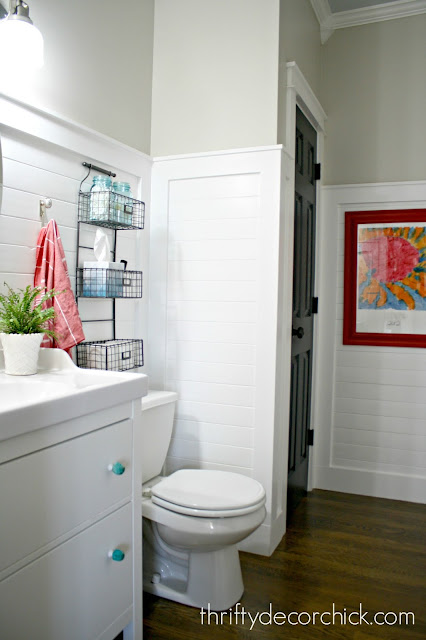
Here's more about the powder room makeover and how I planked these walls (that's what us old folks called it before "shiplap"). We went with hardwoods in here to work with the rest of the main level and I have loved them.
I used a piece of art our son painted as the inspiration for the room -- the accent colors all come from that art:

The white door looked absolutely fine, but after some time I knew I wanted it to match the rest of our interior doors. Black doors are a classic and will never go out of style:

Have you painted your doors a color? I love any color on a door -- blue and gray are another favorite of mine. They add dimension and interest to your home for very little money!
If you'd like to see what this contraption is behind that black door, you can see it here:


Comments
Post a Comment