Outlet with built in USB -- a must have!

What's up and happy Friday! I've got a quick post for you today with an item I've been meaning to share with you for some time because we love it so much. 

I was reminded of it when I shared this photo of our kitchen earlier this week: 
dark gray island in kitchen

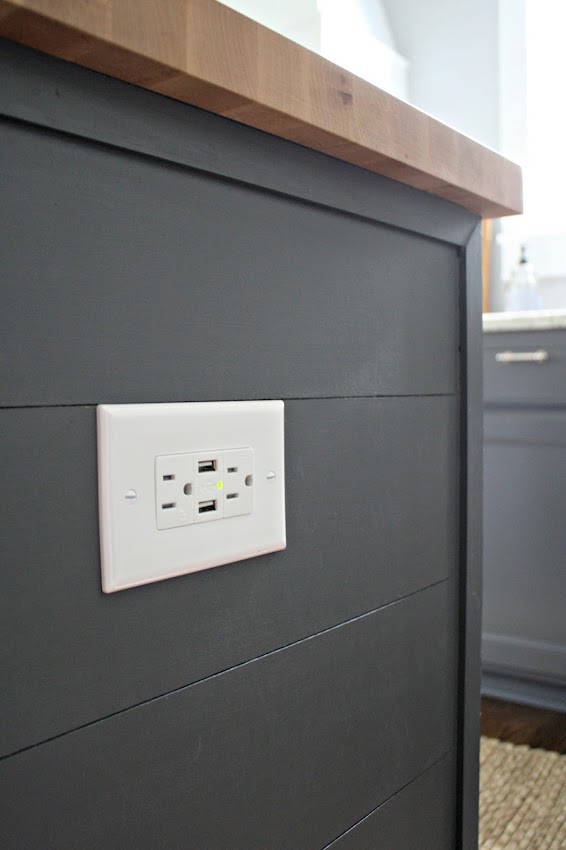
It's the outlet on the side of the island, but it's not just any outlet. It's an awesome outlet. ;) 

First up, I know it bothers some of you that the outlet is white on the dark island. Honestly I don't even notice it -- it doesn't bug me. I've tried painting outlets before and they always end up getting scratched up and become a mess, especially one like this that we use so often. 

If it was a regular outlet it would be easy to change out to a darker one (but nothing matches this dark gray anyway), but as I said, this one is special. ;) There are two usb plugs in addition to the regular plugs: 
Outlet with usb for charging

So you can make any spot with an outlet into a charging area -- with no plugs. It's crazy convenient, no more searching for the little adapter when you need to charge gadgets! We use this one ALL the time. 

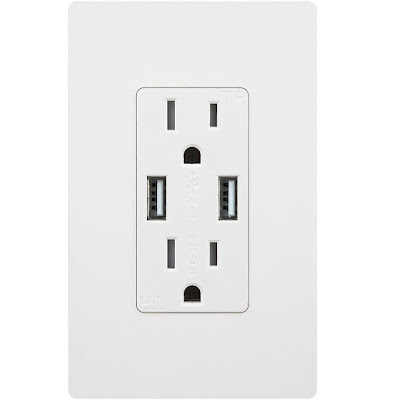
I got this (the brand is TopGreener) from Lowe's but this is the same one online: 
Outlet with usb charger

It's nice if you have little ones because the plugs are tamper-resistant. This outlet does come in a few other colors online but I didn't find those in the store. Also, they say it charges super fast (faster than a normal adapter) and I have to agree. 

It's installed just like a regular outlet -- if you know how to do that it will take a few minutes. If not, it's a matter of disconnecting a couple wires from the old outlet and inserting them into the receptacle. Make sure you turn off the power at your breaker! (They give you photos to follow at that link.) 

Obviously these are more expensive than a regular outlet but by the time you buy two or three adapters you make up the cost. I plan to add one of these in the loft to create a charging station up there as well. We love it! 

As you know I like to share items that work well and this is one of them. Have you tried one of these outlets in your home? Have a great weekend my friends!!


Affiliate link included for your convenience! 

Comments

Popular posts from this blog

My favorite recent projects and posts!

Well hello! Hope you have a wonderful weekend planned! I'm back with another round up of posts from the past few months today. I used to do this monthly but I don't remember to do it most of the time -- so now you get them in batches of two or three months. ;) It's always nice to look back and what I've accomplished around here and it may show you something you've missed! I finished up our loft makeover at the end of the summer -- I shared how I made the giant chalkboard for this space: This is a room that's meant for the whole family so I wanted to make it a fun space. We created a Disney art wall that we'll add to over time. We are going back to Disney World soon and I can't wait to add new memories to this wall!: You can see how we made that Disney pin art in that post as well!  I showed you how I made the large desk with butcher block and how I finished it here :  I also shared my new favorite sanding technique in that post -- it is a SUPER cool tr...

DIY snowy holiday candles (from the dollar store!)

Hey there all! Again, thank you so much for your kind comments on our fireplace makeover and Christmas home tour I shared last week! I have a fun and easy little holiday craft for you today. ๐Ÿ˜ŠThese are nothing new but I've always wanted to try making them.  I gathered some votive holders from the dollar store -- they're actually a great, big size:  I used mod podge and brushed it on -- I'm guessing you could use Elmer's glue too! You just want something that will dry clear:  Then I poured Epsom salts into a plate and just dabbed the votive into a pile of it:  This is the brand we use (we already have it for soaks in the bath after work outs) and that price (linked) is the best I've found!:  I used my glitter tray and knocked the excess off -- this tray is great because you can save the leftover glitter (or salts!) and put them back on the next item:  Speaking of glitter -- a few shakes of that in the Epsom salts pile would be beautiful too!  They ...

DIY stacked stone fireplace (where there was none!)

Well hello! I have a BIG reveal for you today! I worked so hard on this basement fireplace and I'm so so SO thrilled it's done. I'm excited to share it with you today! I took a ridiculous amount of photos so bear with me. :)  I'll show you where we started first! We have this little bump out in our basement and from day one we knew what we wanted to do with it. When we finished the basement years ago we went ahead and bought an electric fireplace for that spot. It sat on a bench for four years. ๐Ÿ˜ A few months ago we decided to have the fireplace built in since the whole space was torn up for the new floors anyway:  Then I was craving a little more traditional look so we had the hearth added along with a mantel:  Then it was time for me to do the rest! I knew I needed to stain the mantel and hearth before I tiled -- it would have gotten all over the tile otherwise. I sanded both down and then cleaned them really well. A wet paper towel does fine:  I ALWAYS use a pre...