Hey there! How was your weekend? We worked hard outside and it's looking so beautiful! A few of you have asked about the backyard tour this summer and I'll have it up as soon as I can. We're so behind this year because we've been working on getting bigger projects done that only happen every few years (like deck and playset staining). We still have to have the house trim painted and then we will mulch, then I'll be sure to share it with you! We've been working so hard but there's so much to be done. Having outdoors spaces is WONDERFUL but a lot of work!
We've used the backyard more that ever this summer because it's turned out so beautiful. We absolutely love it. I shared our new outdoor dining room with you a couple weeks ago:


We've used the backyard more that ever this summer because it's turned out so beautiful. We absolutely love it. I shared our new outdoor dining room with you a couple weeks ago:

I LOVE having the table up under the pergola. We already use it so much more now and I love that we don't have to worry about soggy cushions to enjoy it.
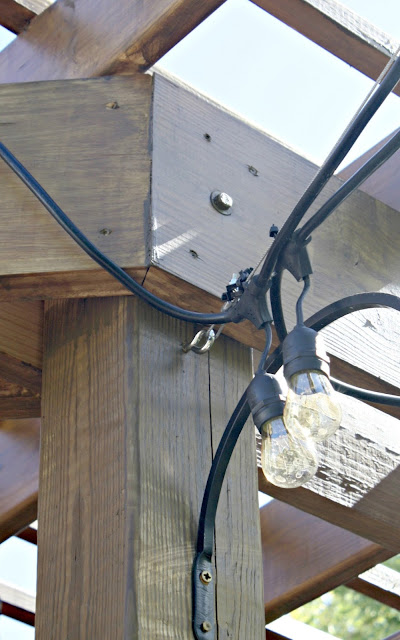
One of the smaller projects we got help with out here was one I've planned for a year now, since we added those pretty lights you see up there under the pergola. I shared more about those lights here and they are still holding up incredibly well, even through the winter. They are the best we've found and I highly recommend them. They are industrial quality -- I see the same ones at restaurants all the time.
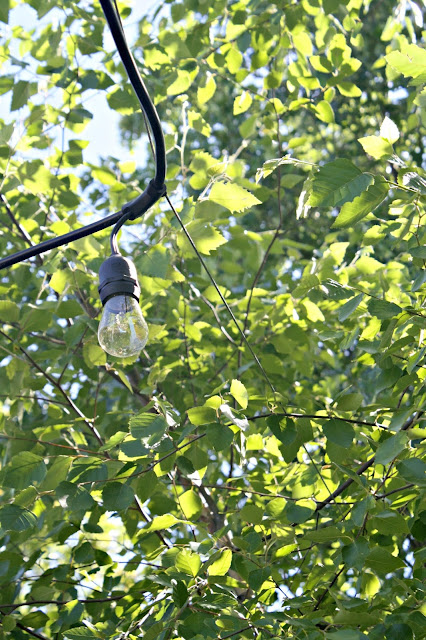
I bought three strands last year and planned to use the third one for this project. I really wanted to string another set out between the trees around our patio, but the river birch aren't strong enough for these heavy lights. Like I said, they're industrial quality so the cords are thick and would weigh down the trees and break them, especially in stormy weather.
So we asked our guys who help us out with projects what they recommended and it was just what I had in mind -- using wires. When I see these strung over patios at restaurants they are usually hung on wires. I believe it's because they are so heavy -- just stringing them alone would pull on the cord too much and they would sag quite a bit.
They ended up getting wire from the hardware store and large eye hooks like this one:

They used some kind of bracket to close down on the wire to keep it taught. These
look like an even better option:
These come with the eye hook and I believe you tighten the wire by twisting.
One end went into the pergola and then they strung it way out to our bigger trees in the back. It was quite a span -- I'd say a good 15-20 yards of wire at the longest section? We have more mature trees back there and they won't bend with the tension. They took another wire over to some bigger trees on the side of the yard as well.
Then they were able to hang the lights buy using zip ties -- as long as you get them tight the the lights won't move anywhere. Here's a closer look at a corner:

See the wire going over through the trees?
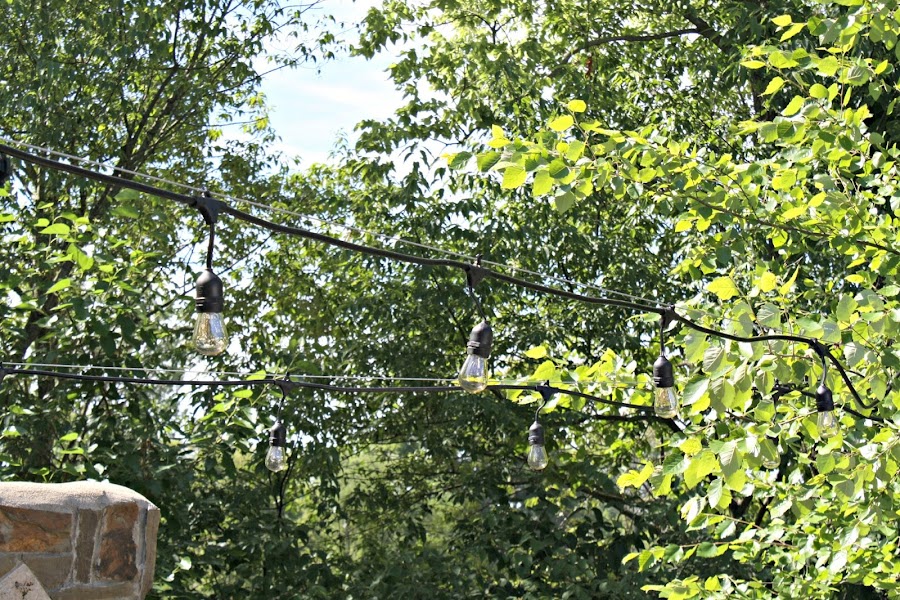
And here's a wider shot of the wires and lights:

I actually wanted a more "droopy" look then what we ended up with, and was almost going to take a few of them off the wire to give that look, but decided against it. I think the more support the better, and the straight look has grown on me. I think it looks clean and keeps them out of the way.
If they couldn't get the wire out to the bigger trees I was going to have them place some poles in the ground, but that would have been a lot more work. (You'd have to dig and use cement -- but it's an option if you don't have strong trees.)
Sometimes you can see the wires a lot and sometimes barely at all. They don't bother me though because they made it possible to have a truly dreamy space underneath. The first night we sat under the lights and giggled like little kids because it was just SO pretty. It's just silly how gorgeous it is lit up.
I was going to take a photo from under the lights for you but we had storms last night. I may update this if I can grab one tonight. For now this is the finished result from further back:

We have quite a grade to our yard so getting high enough in the trees was going to be difficult -- that's why we hired this one out. If you have a flat backyard and something to attach the wires to it would be a pretty easy DIY project.
Just when I think it can't get any better out here, it does! :) They add so much ambiance out here, we just love the look.
P.S. Here's a look at night! :)

Affiliate links included for your convenience!

Comments
Post a Comment