So a couple weeks ago a reader on Instagram commented that I don't have any "close the door" rooms. It made me laugh out loud -- I know those rooms too well. We've had them in the past but over the last few years they have dwindled. It's taken a long time to get to that point (we'll be in the house 12 years this week!) but there is still ONE room.
We don't speak of this room. Only one man dares to enter and that's my husband. OK, I go in to grab clothes because that's where our laundry chute is. But that's it! It's always been a very scary place, especially for me because it was a MESS.
This pit of despair is my husband's office in the basement. He can function in disorganized spaces (he's a creative type -- he plays, writes and teaches music) but the longer I'm on this Earth the less I can handle it. We were just talking the other day how we're both "right brained" but I need much more order than he does.
My husband was a band director for 30 years and he recently retired from teaching. He's actually busier now than he was then, which is why the boxes and piles and items that filled his school office for those 30 years have been an unorganized mess in his basement office since he retired. He simply hasn't had the time to dedicate to going through everything. It makes me twitch a little, but I simply close the door.
Well, a water leak a few weeks ago was a blessing in disguise. We were away for spring break for a few days and the day we got home I heard water running in our utility closet. I knew the sound well -- it has happened for 10 years now. Our humidifier in our HVAC system gets filled with lime and then the connections come apart and the water just sprays out…and then leaks to the basement.
The damage was so much worse than usual because it had been going for days. Our new heating and cooling company replaced the old system and then installed a drip pan directly underneath -- we're praying this eliminates the water issues we've had over the years. Finally a company came up with a plan to help prevent it from happening again!
Because my husband's office is under this spot, it's had the brunt of the water for years now. It wasn't as big of a big deal before we finished the basement. It's happened since we finished it but since we usually catch it so fast we just put industrial dryers in there and it's done. This time we weren't so lucky.
Bottom line -- we decided it was time to rip the carpet out of that room (it was soaked and the padding was a mess) and replace it. I've been researching the best options and found this stuff:
It's vinyl flooring from Allure and it is water resistant. We had carpet installed throughout the basement years ago when we finished it and I quickly realized it was not the best idea. It's our kid zone (and also big family space) and the kids spill stuff all the time. Also, our animals have destroyed parts of it. Our old cat found a spot and if you know how that goes if you have kitties.
It's just kind of gross already and as comfy as it is, we know the carpet needs to go. This stuff will go throughout the whole basement eventually, but for now we focused on this room. They have a ton of color options, but only four in the store that you can purchase. (I got ours from Home Depot.)
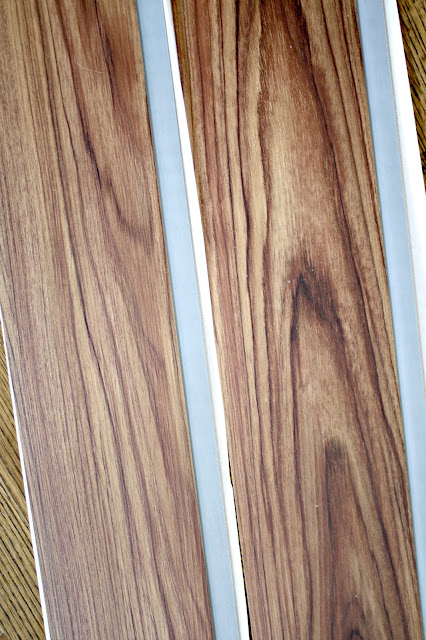
I prefer a slightly darker floor but when we go this home and saw it down there I knew this was a great pick -- it's not too dark and it's really a beautiful color. It truly looks like wood:
It has a some slight texture to it that I love too:
We had to pick it out quickly and get moving because the contractors we use had offered to do it one day last week when they didn't have work. They offered us a crazy good deal. They had already taken out the drywall (where the water had leaked) and replaced that for us, so they threw this flooring in for a little more. I've never laid this stuff (I did install similar vinyl tiles in our mud room as a temporary fix years ago) so I wanted to have them do it so I could watch and see how it was done.
It's a floating floor and there are sticky sections on the sides and underneath each board (see above -- the gray parts). You lay them down (it's a floating floor) and the sticky parts go together. The guys ran out of flooring (more on that in a bit) so I had to run and get another box and wanted to finish it myself:
I laid a few and thought, this will be quick! It was SO easy. You know how saying that always bites me in the butt though. It was easy to install -- ridiculously easy. But there was a little strip at the end that the quarter round wasn't going to cover, so I had to cut thin pieces to fill it:
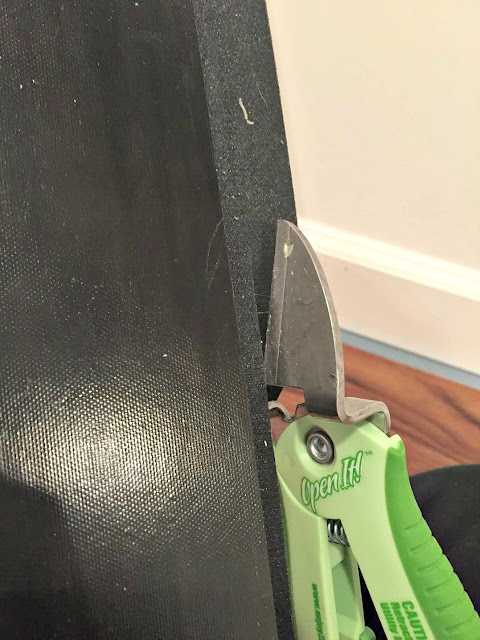
I didn't have a good way to score such long pieces to fit in there so I sat and looked around at all of the scrap and got an idea. I used my favorite scissors (these are AWESOME and I use them all the time) and just cut strips from the sticky part:
There's a sticky part that faces up (the gray) and a sticky strip that faces down with the wood look on top. That's what I cut to make this work.
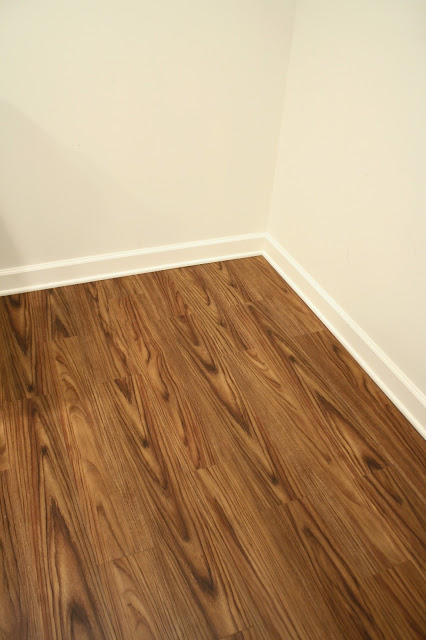
I cannot tell you how thrilled we are with this room and the flooring!! It looks SO GOOD:
It's so warm and clean and I just love it. I can't believe how much bigger the room looks now. Part of that is that we took all of the piles out too -- I have sorted and filled 14 boxes so far. They aren't huge boxes, but still…14 people. And I'm going to get two more today. When my husband's schedule dies down here soon we will sort through it all. For now my next project is to paint the walls and get the room set up again.
I was sure this room was around 9 by 9, maybe 10 by 10 at the most. It's not a big room -- at least I thought. When we actually measured we realized it's nearly 12 by 12 -- that shows you how much stuff was in here! I really should have taken a before picture but then I'm sure you'd never talk to me again. ;)
It's going to be such a great, organized space for my husband when we're done with it. We're both so excited to be able to leave the door open to this room now. Ha!:
Here's some quick things to consider if you are looking into this floor:
1. It is VERY easy to install -- there is no underlayment needed and very little tools (you score it and snap it or use a saw but it will wear down your blade quick).
2. It is a floating floor and it does have that laminate sound when you walk on it (the hollow sound). Not a big deal to me as we don't even wear shoes in the house much and really, this is the best option for a basement that has possible water issues.
3. The price was around $40 for a box and it covers 25 square feet.
4. My only complaint is there is some waste that can't be used -- you have to place the sticky parts together in such a way that when you get to the end and have to cut a piece, you'll have a decent amount left that looks like it's usable, but it's not. You cut off the end with the sticky part to use and the rest won't work. So you will need more than the square footage of your room.
5. When I read up on this Allure stuff a couple years ago (soon after we realized the carpet wasn't going to work) many of the reviews complained of a heavy plastic odor from it. I have haven't noticed anything like that. You'd think it would be even worse in a basement with no windows but I don't smell it at all.
6. My main concern was that it would be cold underfoot, like tile is over concrete. It's obviously not as warm as the carpet but I'm pleasantly surprised with it. It's not freezing cold by any means.
7. As with any flooring, it does need to acclimate in the space where you are installing it for at least 24 hours before you put it in.
I hope this helps if you are considering something similar! Because it's water resistant this is also a great option for bathrooms (and would be warmer than tile). I plan to do the rest of the basement myself -- that's the plan now anyway. It's going to take me awhile but it's so easy to do, I kind of hate to pay for it. Have you installed this flooring? If you have any questions, please let me know!
Affiliate link included for your convenience!


Comments
Post a Comment